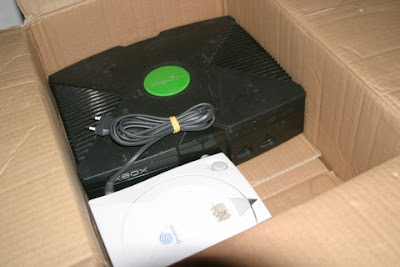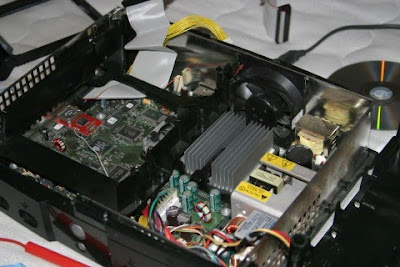
One day, i found something like this:
I'm selling Dreamcast and Xbox(1) for parts. Both consoles can be turned on. I have sold all the accesorries, so you will get only the consoles. Price for both 25 euros.
I own one xbox, also dreamcast but for that price, why not to buy it (if something will break).
OK. so lets check it out:
Parameters:
My Own XBox - DVD-Rom: Samsung, HDD-160 Gb, softmoded(XBMC)
Buyed xbox - DVD-Rom: Thomson (problems with reading media), HDD - 8 Giga, chipped (aladdin), original dashboard
Dreamcast - maybe in another article :)
 Repairing:
There are many tutorials, on how to repair DVD drive. It started only to read burned DVD (but still have some problem to reads DVD`s at all). So you can't play any games neither watch films or play music.
Conclusion:
What about to build a perfect multimedia center. It will have XBMC, can read from Lan, games can be stored on HDD, so you wouldn't miss the DVD Rom at all (but it have to be there `cos xbox won't run). My owned xbox can read all the DVD`s and need to upgrade HDD capacity.
We are starting
So we have 2 parts to accomplish:
1. Clone the 160 Gb HDD onto our new (250 Gb HDD)
2. Putting 160 Gb HDD into buyed Xbox without loosing single byte of data
So we have 2 parts to accomplish:
1. Clone the 160 Gb HDD onto our new (250 Gb HDD)
2. Putting 160 Gb HDD into buyed Xbox without loosing single byte of data
 Before we started, let`s talk about theory:
1. Your xbox won't load or run if you unplugged or damage your original HDD
2. XBOX isn't really for hotswapping (some chips can do it)
3. XBOX is using FATx not FAT nor NTFS.
4. HDD is locked to YOUR console. If your HDD will break, there is probably no chance to run that xbox again (see the 1 point) - every console has it own encryption code and lock HDD to it. That`s the only way, it will comunicate. So even you change that disk for something bigger, always store it for emergency. (maybe rewritting eeprom would help.. but i didn't try it)
4. LOCKING the DISK - as it was mentioned - every disk is LOCKED to his own console. You can unlock it and ReLOCKED it to another. We will talk about it later.
Mission 1.
Clone the 160 Gb HDD to a new 250 Gb HDD
Remember, that if you have xbmc or other FTP-like dashboard, you can easily upload a new program and then run it.Clone the 160 Gb HDD to a new 250 Gb HDD
For this step, two programs have to be on the first (master) disk:
Chimp and XBPartitioner
There is a great tutorial on youtube. Just watch it, and you know how to do it.
As you can see, it`s really easy. Well, the copy process takes me about 4 hours. It also lock the HDD to the console, on which you are working, so it`s a perfect copy. Yes, too perfect. It copied also the partition table, so my G drive has the same free space, as it was on the 160 Gb.
Problem:
Partition G is smaller, than it should be
Conclusion:
There is a utility called XBPartitioner - a small utility, that will create a partition and format it.
How to do it ?
1. Run XBPartitioner
2. Look, if there is 6 and 7 partition (6. is drive F and 7. is drive G). If your HDD have more than 120 Giga, 7. partition will be created.
3. Move cursor to the 7. partition
4. Push Left or Right trigger to change the size.
5. Push Start.
6. After all has been done, double click Back button on joystick
7. Look at File Commander if G drive has the size you have chosen.
Of course, all data has been erased from G drive. But i have them on Backup, so it wasn't a problem. Problem was, that it doesn't change the partition. So how i created it ? Well, let`s call it a fortune.
1.Resized partition 7. to a smaller size,than the free space was (so not the full free space)
2. Looked thru File Commander, if it change. Yes, it change :)
3. Resized partition 7. to a full free space.
With this steps, it really works and i've accomplished this mission with great success :) Now the only task is to FTP the xbox and upload all the content that was there on partition 7. (G)
Mission 2.
Putting 160 Gb HDD into other Xbox without loosing single data
Putting 160 Gb HDD into other Xbox without loosing single data
Remember, that you need to have xbmc or other FTP-like dashboard.For this step, both consoles have to be Chipped or Softmoded.
Programs needed: ConfigMagic (1.6 Final was the version i have used.), Chimp (used in previous mission).
Our task it to unlock HDD from first console and then lock it for the second console. Every console has it own code to lock and unlock drives. So if you put our disk only in second console, you won't be able to unlock it, `cos second console is using other KEY to unlock. So it won't work.
What will you need:
1. Two consoles - one from which the disk is comming and second, where the disk will be installed.
2. Both consoles have to be softmoded or chipped.
3. The second console had to have installed FTP-ed dashboard (not the MS one - XBMC or something like that)
3. HDD, which you would like to unlock and then lock.
So let`s try it on our example.
Console no. 1 - my own - Softmodded, XBMC, 250 Gb HDD (cloned in mission 1.) as a master disk
Console no. 2 - buyed - chipped, original MS Dashboard, 8 Gb HDD as a master disk
HD1 - a disk, which we would like to run on console no 2. (so he will replace the 8 Gb HDD) - 160 Gb full of data for xbox.
As you can see, console 2 has MS Dashboard, so before we are going to run Chimp, we need to replace this dashboard with xbmc or evoX. So let`s change it a little bit:
Console no.2 - buyed - chipped, XBMC, 8 Gb HDD as a master disk.
How to UNLOCK disk:
As the HD1 is comming from Console No.1, it is still locked to it. This is important.
On Console no1.
1. Unplug the new cloned disk (250 Giga)
2. Put the 160 Gb HDD back (make it master !!!)
3. Run the console (as the HDD is locked to it, it will run without any problems)
4. Run ConfigMagic (press A to speed up the intro)
5. Press Start to Continue
6. Now, it will show you your serial no, DVD drive and so on.. there is also HDD serial and something like Current HDD unlock Password - LOCKED (and a couple of letters with numbers) - thats the code.
7. Press Start - a menu will popup
8. Choose UNLOCK HDD.
9. If everything goes fine, you shoud see, that Current HDD unlock Password UNLOCKED and no letters are displayed.
10. Press Start once again and from the menu choose EXIT ConfigMagic
11. Turn off the console.
So now we have unlocked the HDD. Wasn't it easy ? :)
We will do the same as in the mission 1, until the step, where it is pushed on clone HDD.
On Console no.2 - don't forget to make HD1(160 Gb) as a slave (carefully watch the video)
1. Make all from that video (our unlocked disk will be as a new hdd in video) till the Chimp running
2. After you run Chimp, connect and power up our HD1, choose the first from menu to find new HDDs (click on 1 and yes and after that OK)
3. Go to Lock HDD (as it was also in mission 1). press OK (or yes).. you will see, if it goes right . If it will said, that ERROR - first Unlock the drive, then you have done something wrong at first console
4. Turn off your console
Now the last part. Take out the original disk from console no2. and store it in safe place. Replace it with your newly locked HDD. That`s all :)
 Don't know why, but i have to open the DVD rom first, after that XBMC will load from HDD. This is the only issue, that happend :) UPDATE: The issue was, that XBMC was installed on a softmodded console. After reinstalling the XBMC for Modchip, everything run smooth and great.
If you know other way, how to done this, just write :) will be glad :) Sorry for mistakes and my baaaad english.
Žiadne komentáre:
Zverejnenie komentára